|
December 6, 1997
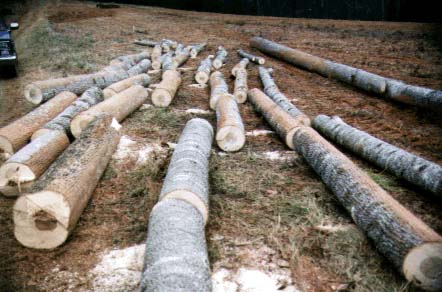
 Some of the more than 80 logs (from 20 trees) harvested from the wooded area which will be milled into lumber for the barn. The trees were cut over a large area so that the loss of a single tree wouldn't be that noticeable. If we had cut them all from a small area it would have seemed like clear-cutting. Most of the logs are yellow poplar, and a few are red oak - to be used mainly for beams.
December 8, 1997
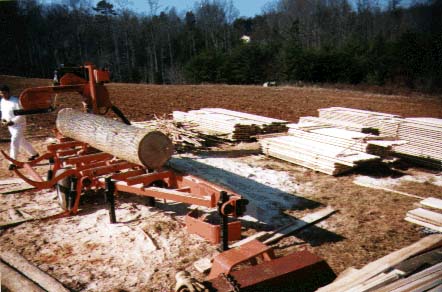
 This is the Wood Mizer portable sawmill that I had brought in to cut the logs into lumber. It took four 10-hour days of constant sawing, with me feeding the logs and offloading the lumber and slabwood.
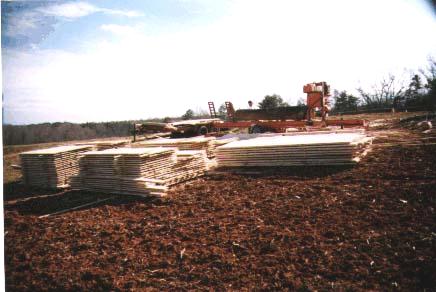
 I figure we sawed about 5000 board feet of lumber. We cut red oak 2x10's, poplar 2x8's, 2x6's, 2x4's, 1x8's, and 1x4's, in lengths of 8', 10', 12', and 16'. It made several nice stacks of lumber. The cost came to about $.20 per board foot, compared to about $.40 to $.50 for rough cut lumber. It's not dried, but it will be great for a barn. The surface produced by the Wood Mizer, which is a band saw, is a little rougher than finished lumber, but much better than traditional rotary saw rough cut lumber.
 At right, is a 3D drawing of the barn. It is 24' x 32', and of a salt-box design, where one roof is approximately 3 times longer than the other. This permits the left half of the barn to be a future woodshop with 7-12' sloping ceiling, and the right half to be a single-bay with a loft on the back half and 16' peak ceiling - this half will have 9' doors on each end for driving equipment thru. The posts, beams, rafters, and collar ties are all that's shown here, but the entire barn has been designed in 3D on a computer.
January 26, 1998
 Construction has finally begun. Being a pole barn, the first step was laying out the pole locations, augering the holes (2-3 feet deep), and cementing the 6x6 pressure treated posts in the ground. Of course a lot of care in locating the posts and making sure they are plumb and braced securely makes the later stages of construction much easier and better.
The big beam is a built-up beam made from true 2x10 red oak sandwiched around some 3/4" plywood for stability. It is nailed and bolted every 18", and spans 24'. Even after adding the roof later, the sag is only about a half inch in the middle.
January 31, 1998
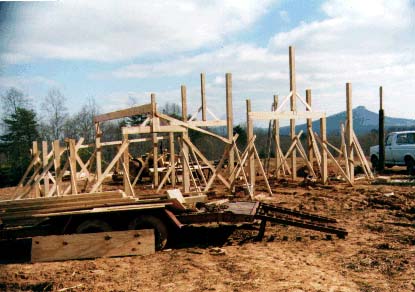
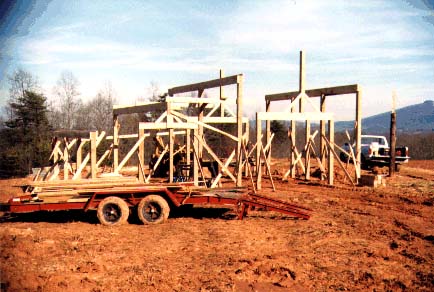
 The remaining beams have been added. They too are true 2x10 red oak, with one bolted on each side of the posts on each end of the barn and in the center. The ridge will be via a conventional ridge board and collar ties. At this point, some braces were added between the beams and the posts. This is what gives a pole barn diagonal stability. Conventional framing relies on the sheathing to provide diagonal support. Pole barn construction with board and batten siding does not get diagonal support from the siding.
February 21-28, 1998
 In these next 3 photos, the rafters are being put up. Starting on the low side, the first row is put on. The design of the long roof with the long built-up beam and the beams in the middle permit use of shorter lengths of 2x8's for the rafters (10'), rather than handling longer boards (20-30'?). Much easier and also more efficient when sawing the logs.
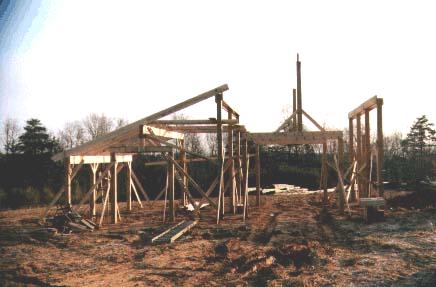
 As I worked my way to the peak, I was sure to add more braces to the posts and beams and ridge board and posts. The ridge board was braced to keep the whole top side from folding front to back with the added weight. Even though care was taken in the initial placement of the posts, the use of 3 separate rows of 10' rafters required careful measurement and cutting to ensure that the long roof was flat. It would be easy to have each row of rafters on a different plane, or a different pitch.
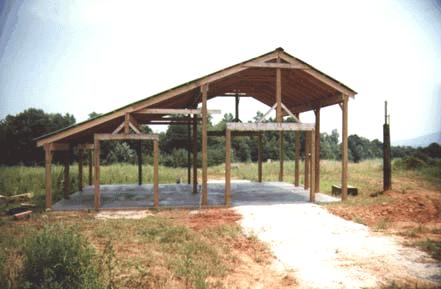
 Finally, the peak is framed in. This is difficult to do by oneself. However, with enough C-clamps and the benefit of a backhoe with a front bucket, it can be done safely by one person. I was able to support the ridge board with a board clamped vertically to the side of the backhoe front bucket, while I climbed up and put a rafter on each side. Once that first piece of ridge board is up, the rest is just one board at a time. On every other rafter, 2x6 collar ties were added to keep the walls from spreading.
March 7-8, 1998
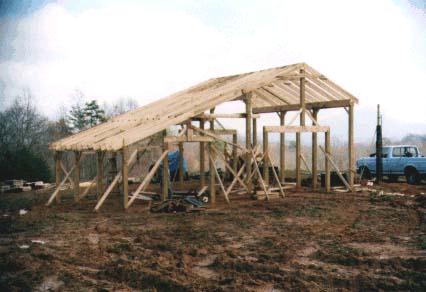
 Then the pace picks up. Throw on the purlins on 2' centers across the rafters, and add the roofing. In this case, I used Ondura corrugated roofing. This is a bitumin-based roofing, similar to the stuff used to make shingles, only thicker. It comes in 48" x 79" sheets which overlap to cover 44" x 72" at a time. The purlins took about 5 hours to do, and the Ondura took about 6 hours to put on - all by myself. Try that with sheathing, roofing felt, and shingles!
The next priority is to rough the 600' driveway in better so that a cement mixer can get in to pour the floor. I want to do that before putting the siding on to make it easier to pour and finish. I'll be adding updates here soon, so check back!
October 7, 1998
 Well, it was a long time coming, but I finally got the floor cemented on July 18th. The spring weather was uncooperative (wet) and during the early summer I was recovering from a broken nose and the resulting surgery (softball). Prior to cementing I graded and widened the driveway and had 80 tons of gravel hauled in. Then the well-driller came and after wiring and putting in a waterline, we had water at the barn. Wow, water and electricity...we could almost live there!
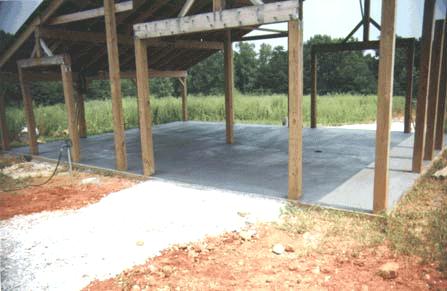
 The floor took 9.5 yards of cement, and a few of my friends and I took the morning to level and finish it. I didn't really want a perfectly smooth finish (which tends to be slippery with wet boots), nor did I want a "sidewalk" finish (broomed). So I smoothed it out and at the last minute before it dried completely, I gave it a very light broomed finish. The effect is good, and when I applied a coat of sealer, it gives just the right amount of tracton yet it is easy to sweep with a broom. There is a drain in the high-bay, drivethru side, with about 1 inch of fall, and the low-bay, workshop side is flat - better for working on wood projects.
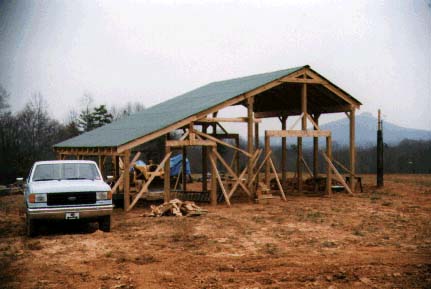
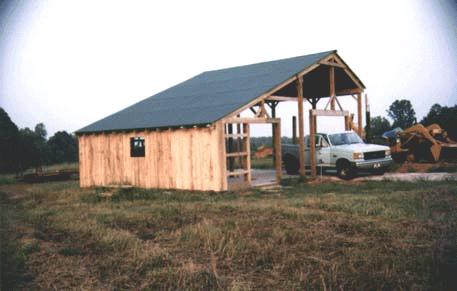
 Then, shortly after that, the siding goes up. (I'm bushhogging the 8 acres at the same time, so it's not as fast as I would like.) I start with the low side, of course. Another pressure treated 2x8 just above floor level, then poplar 2x4's spaced 2 ft above that are what will hold the 7 and 8 inch wide boards. I originally wanted all 8 inch wide boards, but some of the trees would cleanup at 7 inches and rather than cut more 2x4's or something else I didn't need, I cut the "undersize" 8 inch boards for siding, also. This had the unexpected benefit of being able to use some combination of 7 and 8 inch boards to exactly fill the sides of the barn, without having to rip one and use a half a board or so somewhere. I have to remember that trick. I dipped the bottom end of the boards that will be next to the ground in a mixture of kerosene and old motor oil, to act as a preservative. In general though, we'll let the siding age naturally, untreated, until it's that nice gray color, then we'll coat it with the kerosene/motor oil mixture to preserve it at that stage. Some of the boards that were on top of the lumber pile have aged very nicely already.
 Then, with the practice side under my belt, I take on the most important side - the front. Most of the boards I sawed from the logs are 8 ft in length. I did this to make it easier to handle the logs and the finished boards, and it makes more efficient use of the logs. But if I had it to do over again, I would cut them all to 16 ft lengths, and trim the boards to fit. This would eliminate the horizontal joints between board ends butting together vertically. When I was sawing the logs, I did have one 16 ft log that I was saving until the end in case I needed more 10 or 12 ft boards for the framing. But, at the end, I had more than enough framing lumber, so I decided to cut it into 16 ft 1x8's for siding. I used these on the front, and the number of boards butted end-to-end is small (5 or 6), and the joints worked out pretty good on those.
 Now we're rolling! Being that only 8 ft boards are left, the right side is sided with 8 ft boards butting up to 4 ft boards. I put a few up with all the 8 ft boards on the bottom, and the 4 ft boards on top, but the resulting lineup of all the joints didn't look attractive to me. So I removed them and alternated putting 4 over 8 and 8 over 4, and this looked much more pleasing. It should be noted that the butt joints are actually beveled 45 degrees so that there will not be "look-thru" between the board ends, and so that any rain running down the siding will not run back into the barn. The front side with all the angled ends and variable lengths took a lot of time to do, but the sides with the constant lengths went very fast.
At this point, the structural part of the barn is complete, and the siding is 75 percent complete, and I still had a substantial pile of 2x8's, 2x4's, and siding remaining. So, after doing some figuring, I decided to use the excess lumber to extend the back side another 10 ft. This would make the barn 32 ft wide by 34 ft long, adding more than 40 percent additional floor space for relatively small cost. The additional cost, about 15 percent, is in the form of more pressure treated 6x6 posts and 2x8's, roofing, and cement for the floor. So I'm getting 40 percent more space for 15 percent more cost. As of this writing, the posts are up, and the beams are about half up. This addition should go up much more quickly than the original structure, and in fact it is.
November 28, 1998
 The posts, beams, and rafters of the 10' addition all went up in about 2 weeks time, working mainly on weekends and a couple of afternoon/evenings a week. The roof and purlins were next, and they took about a day to complete. Then, I poured the concrete floor last week, after spending a day or so forming it up and compacting the gravel I put in to level the area up. (The A makes a good compactor, with the narrow front wheel spacing that gets in the corners really well.) In this photo, I have already put up the siding on the low side, and am putting up the girts on the back side.
December 19, 1998
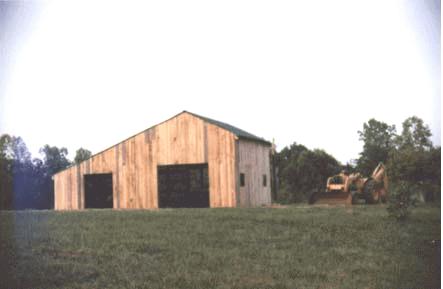
 The siding is now all up; at least the "board" part of the "board & batten" is up. Since the weather is turning slightly foul (winter), the battens can wait until spring. I've also boxed in the eaves, put in all 4 of the sliding windows, and hung all the doors. The doors are made of 1", tongue and groove pine that I had stacked out back of my house. (The Siemens Westinghouse plant I work at in W/S buys 5-spindle RigidMill machine centers from Switzerland, and this wood is what the wooden shipping box is made from. One box was made of enough wood to make all 3 barn doors, plus extra that I'll use for the loft floor.) I bought new hangers and box rails, with the associated bottom rollers and rail brackets. They went up pretty easily, and work great. I still haven't put up all the door cross-bracing to make them look like barn doors, nor have I put up all the door stops yet, but I will.
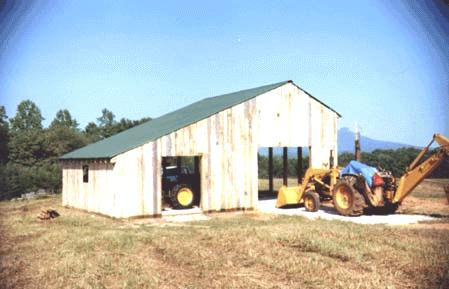
December 25, 1998
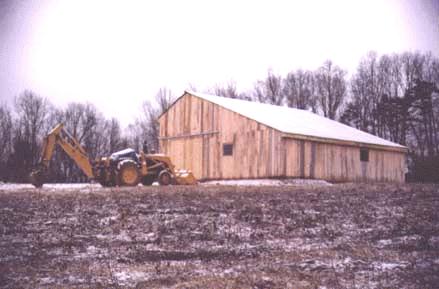
 Well it's the barn's first Christmas, and how fitting... it was a white one. We got about 2" of snow on Christmas eve, and it really makes everything look beautiful. This photo is of the back side. In North Carolina, white Christmas's are rare - it's my first in the 12 years I've lived here. (In Pa., where I was born and raised, they were much more common!) It's been right at 1 year since I first cut down those trees, and although it has taken a little longer than I first expected, it has progressed well in spite of all the distractions that got in my way.
The pace of construction will slow considerably until spring. At that time, when the weather breaks, I'll be putting up the battens and some trim, hopefully before we start the house. I expect to be doing a lot of stuff with the house too, and unfortunately, the house will have priority. Also, after the exterior ages to a gray color, I'll be spraying it with some sort of preservative - probably a kerosene and used motor oil mixture. I expect that aging process will take 6 months to a year. Until spring, I'll be working on the '51 M: finish-sanding and painting the sheetmetal, and doing some wiring inside the barn.
|