|
|||
|
|||
|
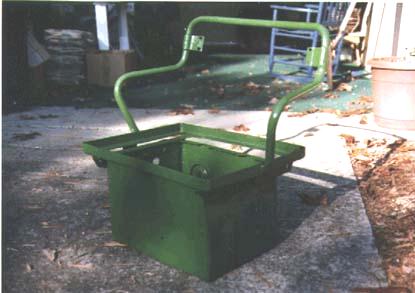
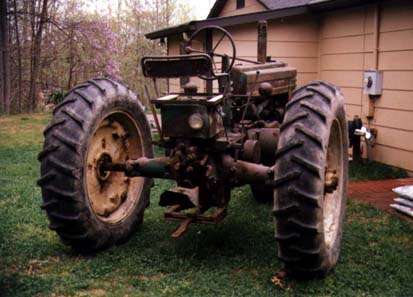
April 15, 1997 However, since it is a working A, and I have several uses for it around the house, I need to maintain it in good working order. To this end, I have made a seat for it, to replace the board that has been in use for that purpose - my butt appreciates it: and I've also replaced the muffler - the neighbors will thank me for that.
The only plans I have for the immediate future (i.e. until the TR6 is finished) are to narrow the rear wheel spacing by 6" so that it fits on my trailer, and to shore-up the loose and wobbly seat support. After the TR6 is finished, the A gets its turn in the garage. A full restoration is NOT in the works, just a good refurbishment to make it work and look respectable. My intent is to make it look like it was when it was 5 to 10 years old. I expect to add pictures to this page in a short while - the roll of film is about half taken. Check back in a month or so. June 11, 1997 June 13, 1997 August 30, 1997 Well I finally painted the TR6 last weekend, and it looks good. Just a little more work to replace the windshield (broken) and muffler (blown out), and put all the lights, bumpers, and trim back on, then it's road worthy and out of the garage. In the meantime, I've been cleaning, scraping, and wire-brushing, and trying to get all the leaks fixed on the A. Nothing major, just a drip or seepage here or there. It's not exciting work, but it needs to be done, and there's a lot of value added - - it gets you in close so you can see the details. I've identified numerous things that need fixed or replaced, like headlights, some seals, bolts for holding sheet metal on, and other things that you don't see just by looking. October 28, 1997 So, with the help of my Dad, I drained the radiator, removed the coolant pipes, carburetor, generator, and exhaust pipe. Then after taking off the valve cover, we removed the rocker arm and shaft assembly and pulled out the push rods to keep them from getting in the way. Then we took the connecting rods loose from the crankshaft. With a floor jack supporting the block, we took off the 6 nuts securing the block to the crankcase, and carefully slid the block, pistons, head, and manifold assembly out away from the crankcase. It was quite a bit heavier than if we had removed the head and pistons from the block, but there was nothing wrong with that end, and I didn't want to disturb it unnecessarily. Besides, the whole head gasket kit was over $100, while the one gasket I needed to replace was $4. After cleaning both surfaces, we installed the new gasket and slid the block assembly back into place and tightened the 6 nuts. We also checked the connecting rod/crankshaft play as we were assembling them, and we had to take a shim from each to get the right amount of play. As we were taking the rocker arm and shaft assembly off earlier, we had found a broken rocker arm adjusting screw on one of the arms, so we installed a new one I had gotten from the JD dealer during one of our breaks. It was then that we discovered that the rocker arm had been bent about .25", but it appeared that there was still sufficient adjustment in the adjusting screw, so we continued the assembly with the bent one (besides, it was now Saturday night and the JD dealer was closed). We then re-attached the exhaust, carburetor, generator, coolant pipes, and filled the radiator with coolant. It had always been finicky starting, but this time it was particularly hard to start, and now it idled rough when we did get it started. Also, it wouldn't rev up very well: it would start backfiring, coughing, and sputtering. To make a long story short, after changing the plugs, checking the valve play, changing the plug wires, checking the gas, and checking the timing, we decided to change the bent rocker arm and start over again. A friend of mine gave me a rocker arm from a spare valve assembly he had, and after adjusting the play, it started and ran better than it has since I've owned it. The bent rocker arm must have been causing a slight bind in the valve mechanism that wouldn't let the valve close completely or fast enough, thereby letting the burning cylinder charge burn back up the intake towards the carburetor. Before beginning this repair, it was hard starting, but it ran well. I don't know how, but the broken adjusting screw and bent rocker arm combination somehow worked moderately okay before it was repaired, but we made matters worse by only replacing the adjusting screw. With the good adjusting screw and rocker arm, it's no longer finicky starting, and it is much smoother running with a noticeably better rhythm to the exhaust note. Since then, talking to people, I've heard of one other instance of a broken adjusting screw and bent rocker arm on an A. I'd be interested to know if anybody else has had this problem (rummy@johnnypopper.com). I know it's a bit wordy, but I thought it was a rather interesting turn of events and realization of how important good alignment and adustment of the valve mechanism is. I started the day trying to stop a nagging oil leak, and when I ended the day, I had fixed the leak and a serious valve problem, and markedly improved the starting and running performance of my A. March 23, 1998
May 8, 1998 |
|||
|
Created: 4/15/97 ----- Last Update: 5/8/98 |


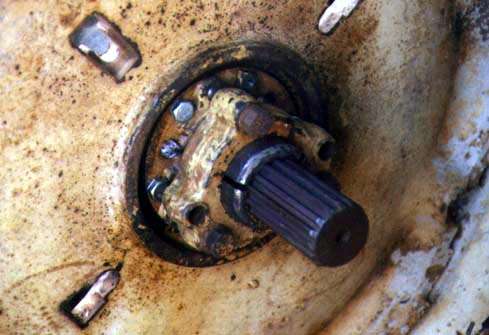
 I noticed that some of the nuts were also loose, but I don't know which one caused the other (loose nuts allowed the gasket to fall out or blow out, or loss of gasket caused the nuts to loosen).
This allowed oil to leak from the joint, not a lot, but enough to cause a constant dripping and a puddle to form under the tractor while it was running. The loose nuts were also a potential catastrophe waiting to happen.
I noticed that some of the nuts were also loose, but I don't know which one caused the other (loose nuts allowed the gasket to fall out or blow out, or loss of gasket caused the nuts to loosen).
This allowed oil to leak from the joint, not a lot, but enough to cause a constant dripping and a puddle to form under the tractor while it was running. The loose nuts were also a potential catastrophe waiting to happen.